Как да сменим посоката на греда от хоризонтална във вертикална.
- #483
- 11 Apr 2017
- 3:47
Полезните части за смяна на посоката

Първо можете да използвате Г-образните греди, които идват в два варианта - голяма и малка.
Може да използвате и двойно-пречупената греда, която е особено полезна за свързване на мотори.
Можете да използвате и Т-образните греди.
Отново свързвайте с два щифта

За някои от ъгловите греди ще се наложи да използвате щифт с ос, който съчетава ос и щифт в едно.
Гредите с кръстати отвори са малката Г-образна и двойно-пречупената греда.

English
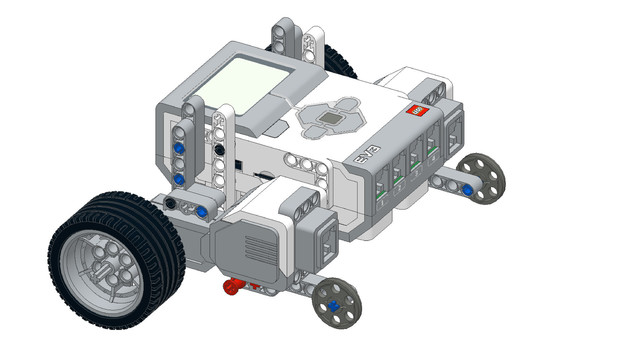
Sometimes you need to extend the construction but not only horizontally but also vertically. And in this video we'll stop at some of the parts and the principles for extending the construction vertically. As an example we'll use this touch sensor. And the goal is to place this touch sensor at the front of the robot but pointing vertically up. What I'll do is take a beam, 2 pins and as you might remember from the previous video from the course we don't add the pins next to each other. We leave at least one hole between them and we have the 2 pins with the beam pointing forward. Our goal is to have the touch sensor in this position. So, we must change the direction. You can see that the direction of this whole construction - the beam is horizontal, now we must change it to vertical. And we can use a number of different parts. We have these L-shaped beams. This one is 3x5 and this one is 2x4 holes. We have the double angular beam and we can all use them to change the direction. How could we do this? First, I'll take the L-shaped beam, add 2 black pins, place here and now using the long blue pin we can attach the sensor.
Like this. And as a result we've changed the direction of our construction. Our sensor is pointing up. We can also use other parts. For example, we can use this double angular white beam and it will serve again the same purpose. The only difference is that here we should place an axle pin, a blue axle pin and one black pin,
attach and in the same way attach the touch sensor.
Like this. We can stack these solutions and we can now change the direction. We can change the direction again to horizontal using this L-shaped beam but this one is 2x4. I'll use a blue pin - long blue pin and one of the black pins. Now, because this is 2x4 and here we have only 2 holes what happens is that there isn't a whole in between these 2 holes to leave space so we are kind of like bound by the construction by the decision of the maker of these Lego parts to have these 2 pins next to each other. Then we add them right here and one more long blue pin and we add the sensor. And now we have a horizontal construction, a vertical construction and then a horizontal again. And we've changed the direction twice - first vertically and then horizontally.
Курсове и занятия включващи този Урок
Този Урок е използван в следните курсове и занятия.
EV3 Phi. Introduction to robotics with LEGO Mindstorms
The things that you will be able to do with your EV3 robot by the end of this course are:
Freely move your robot towards desired target;
Avoid obstacles on the path of your robot using sensors;
Follow lines of any shape;
Detecting and picking up objects of any kind;
- 92
- 220:20
- 36

Extending without instructions. Basic principles
Съвети и често срещани грешки, когато трябва да свържете две греди.
- 4
- 0
- 0
- 3d_rotation 0

Роботика с LEGO - Ниво 1.0 - Приключение в Космоса
Първото ниво от учебната програма по LEGO роботика за ученици от пети до дванадесети клас.
В нивото се изграждат различни конструкции на роботи. Управляват се моторите така, че роботите да извършват прецизни завои около „земята“ и „луната“. Преодоляваме различни препятствия след като се блъснем в тях благодарение на сензора за допир.
С помощта на сензора за разстояние роботът се движи без да се блъска в заобикалящите го препятствия. Достигаме до понятията цикъл, градуси, среден мотор. Накрая роботите могат да изпълняват едновременно две различни неща - докато изпълняват мисии върху специално изградено поле, третият двигател разчиства засечени обекти.
- 126
- 123:52
- 150
Занятие 3 - Разчистване на площадка за кацане
Въведение
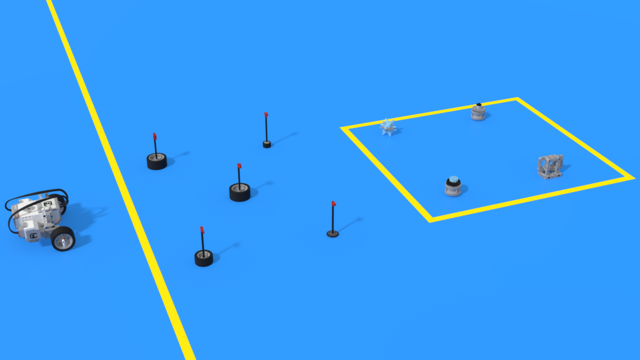
Днес ще построим робот, който разчиства автоматично площадка за кацане.
Преди да кацнете с космически кораб на Луната, изпращате робот, който да почисти площадката за кацане. Вашият робот ще бъде пренесен с ракета до Луната и задачата му е да разчисти площадка за кацането на вашия по-голям кораб.
Роботът каца малко по-далеч от площадката, която трябва да разчисти и за това трябва да навигира до нея. За съжаление пътят му е затрупан със скали, които не може да премести и трябва да ги заобиколи.
- 9
- 4
- 2
- 3d_rotation 0
Роботика с LEGO - Ниво 1.0 - Приключение в Космоса
Първото ниво от учебната програма по LEGO роботика за ученици от пети до дванадесети клас.
В нивото се изграждат различни конструкции на роботи. Управляват се моторите така, че роботите да извършват прецизни завои около „земята“ и „луната“. Преодоляваме различни препятствия след като се блъснем в тях благодарение на сензора за допир.
С помощта на сензора за разстояние роботът се движи без да се блъска в заобикалящите го препятствия. Достигаме до понятията цикъл, градуси, среден мотор. Накрая роботите могат да изпълняват едновременно две различни неща - докато изпълняват мисии върху специално изградено поле, третият двигател разчиства засечени обекти.
- 126
- 123:52
- 150
Допълнителни задачи за да направим истинска снимка на далечната страна на Луната
Време да приложим всичко научено досега на практика. Да направим робот шпионин!
- 3
- 0
- 6
- 3d_rotation 0
Роботика с LEGO - Ниво 2.0 - Роботи в производството
Третото ниво от учебната програма по LEGO роботика за ученици от пети до дванадесети клас.
Роботите започват да използват по два или три сензора едновременно и учениците създават по-сложни програми за тях. Изучава се действието на диференциала и как той помага на роботи с един задвижващ двигател да завиват. Роботите си взаимодействат като си предават информация или детайли един на друг и учениците изучават задълбочено как да следват линия по-плавно. В края на работния ден роботите излизат от поточната линия и се възстановяват с игра на волейбол.
- 44
- 15:01
- 129
Конструиране
Съвети и често срещани грешки, когато трябва да свържете две греди.
- 2
- 0
- 3
- 3d_rotation 0
Python за EV3 LEGO Mindstorms - ниво 2
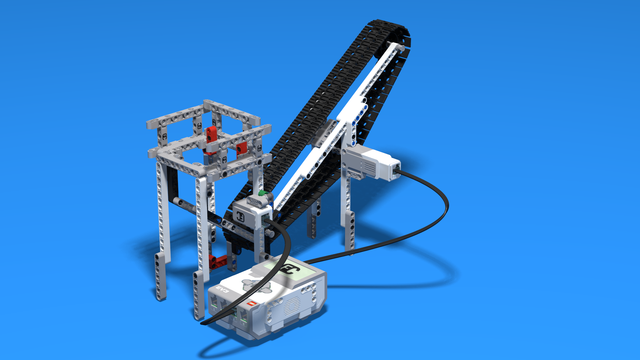
Във второто ниво по Python за EV3 роботи учениците изучават в дълбочина сензора за допир. Сензорът се разглежда както като средство за ръчно управление на машини, така и като сензор за автономни роботи. В няколко занятия учениците изграждат пулт за управление на хващача и движението на кран. От страна на програмирането учениците изучават конструкциите за разклоняване на код "if-else", условните и безкрайни цикли с "while" и операторът за обръщане на условие "not". В края на нивото роботите могат да усещат препятствия които да избягват и излизат от простичък лабиринт.
- 39
- 19:58
- 93
Припомнете си
Съвети и често срещани грешки, когато трябва да свържете две греди.
- 2
- 0
- 0
- 3d_rotation 0

Ниво A - Въведение - Роботика с LEGO
Първото ниво от учебната програма по LEGO роботика за ученици от втори, трети и четвърти клас.
Едно, “пътешествие из космоса”, но с роботи. В нивото се изграждат различни конструкции на роботи. Управляват се моторите така, че роботите да извършват прецизни движения около „земята“, „луната“ и „слънцето”. Преодоляваме различни препятствия след като се блъснем в тях благодарение на сензора за допир. Изграждаме и програмираме роботи, които могат да се сражават и защитават стига това да се наложи.
- 142
- 133:42
- 187

Занятие 5 - Разчистване на площадка за кацане
Важно е да даваме обратна връзка за учениците си. Стараем се да го правим редовно по време на курса. По-долу следва описание какви рангове пишем училището по роботика и кои аспекти от поведението на учениците ги определят.
Днес трябва да поставите рангове на учениците си според инструкциите тук.
- 11
- 3
- 5
- 3d_rotation 0

Роботика с LEGO SPIKE Prime - Ниво A
Първото ниво от учебната програма по LEGO роботика за ученици от втори, трети и четвърти клас.
Едно, “пътешествие из космоса”, но с роботи. В нивото се изграждат различни конструкции на роботи. Управляват се моторите така, че роботите да извършват прецизни движения около „земята“, „луната“ и „слънцето”. Преодоляваме различни препятствия след като се блъснем в тях благодарение на сензора за сила. Научаваме любопитни факти за Слънчевата система и за космическите апарати.
- 64
- 30:30
- 76

Занятие 5 - Разчистване на площадка за кацане
Важно е да даваме обратна връзка за учениците си. Стараем се да го правим редовно по време на курса. По-долу следва описание какви рангове пишем училището по роботика и кои аспекти от поведението на учениците ги определят.
Днес трябва да поставите рангове на учениците си според инструкциите тук.
- 7
- 4
- 12
- 3d_rotation 2
Ниво A - Въведение - Роботика с LEGO
Първото ниво от учебната програма по LEGO роботика за ученици от втори, трети и четвърти клас.
Едно, “пътешествие из космоса”, но с роботи. В нивото се изграждат различни конструкции на роботи. Управляват се моторите така, че роботите да извършват прецизни движения около „земята“, „луната“ и „слънцето”. Преодоляваме различни препятствия след като се блъснем в тях благодарение на сензора за допир. Изграждаме и програмираме роботи, които могат да се сражават и защитават стига това да се наложи.
- 142
- 133:42
- 187
Занятие 4 - Завой около Луната
Въведение
Днес роботът ни ще бъде космически кораб като предният. Целта ни днес, обаче, е конкретна: Да достигнем до далечната страна на Луната!
Къде се намира далечната страна на Луната? Защо е толкова трудна цел?
- 13
- 3
- 5
- 3d_rotation 1