След като вече изпробвахте и се справихте с предизвикателство, включващо поредица от инструкции, искаме да ви представим някои добри практики.
- #413
- 15 Mar 2017
- 2:51
Тествайте блокчетата едно по едно
Лоша практика е да се поставят няколко блокчета и след това да се тества. Проблемът е, че когато се появи грешка, няма да можете да разпознаете в кое блокче е причината.
Разберете задачата
За да решите една задача правилно, трябва да сте сигурни, че правилно разбирате какво се иска от вас. Затова, кажете на глас как разбирате задачата и се посъветвайте с учителя дали правилно сте разбрали.
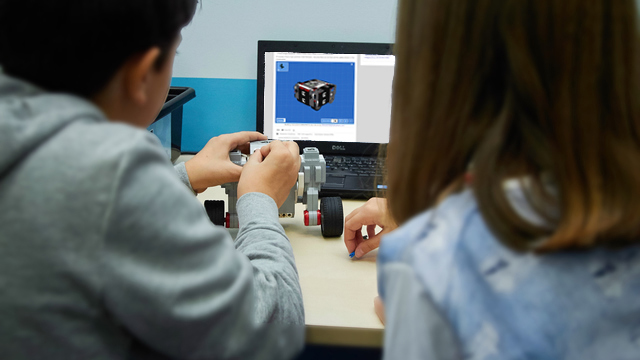
Тествайте всяка стъпка на програмата с робота
Това е най-важното, което искаме да ви кажем! Следвайте този алгоритъм:
- Поставете един или два блока в програмата си и ги настройте;
- Свалете програмата от компютъра на робота;
- Поставете робота на пода, на стартовата позиция;
- Изберете програмата от менюто на бриковете и я стартирайте;
- Наблюдавайте резултатите и преценете дали роботът се държи, както очаквате:
- Ако поведението на робота е "правилно", както вие искате, продължете нататък
- Добавете нови блокчета в програмата, разширете я;
- Ако се появи грешка, то тя е в новите блокчета, които току що сте добавили.
- Поправете грешката и наблюдавайте отново.
- Ако поведението на робота е "правилно", както вие искате, продължете нататък
Използвайте опцията за сваляне на софтуера
По този начин вие контролирате къде и кога да стартирате робота, като при нужда можете да стартирате програмата от брика няколко пъти.
English
When building a program with a series of instructions at the end we have the following program.
That was the Yo-yo challenge. And there are a couple of best practices of how you should develop such programs and in this video I'd like to discuss these best practices.
Now, this is a complex program because it involves several blocks. And it is not a good idea to place all the blocks at once and to try to run the program because it will not work correctly. So, you should try do develop the program in small steps. First, the most important thing, understand the challenge. You can ask for some clarification from the instructor, from the teacher. You can also comment below the video or look for answers in the comment sections. So, you should understand the whole challenge. Then create a program using only one or two blocks. Download the program from the computer to the robot. And you can use Bluetooth, you can use USB. But after you've implemented a program with one or two blocks you just download this program to the brick. And now I'll download my program right here.
Just download without running. Then you take the robot, place it on the floor where you have the starting position and from the menu you select the program that you want to run. And press the button.
So, we have the first two blocks of the challenge. We observe them and we decide, okay, this is something correct. Then we can extend this program. If the behavior is not correct, we can change it. But if it is correct, we just extend it. In this way we have in small steps developing the program. And we know exactly where the error is if there is an error. Because we don't move forward until we have the small fragment of the program working, these small one or two blocks. That's why it's important that you use the download option. Because you can actually take the robot, place it, run and then observe the behavior of the robot.
Курсове и занятия включващи този Урок
Този Урок е използван в следните курсове и занятия.

EV3 Phi. Introduction to robotics with LEGO Mindstorms
The things that you will be able to do with your EV3 robot by the end of this course are:
Freely move your robot towards desired target;
Avoid obstacles on the path of your robot using sensors;
Follow lines of any shape;
Detecting and picking up objects of any kind;
- 92
- 220:20
- 36

Series of instructions make a program
Задачата е да програмирате робота да се движи напред и назад с все по-малки разстояния.
- 11
- 0
- 4
- 3d_rotation 0

Instructors Remote Training
If you are working with students and you want to introduce Robotics to your class or you want to mentor a FLL team, but you are insecure about your technical knowledge in the Robotics field, then this is the right place for you. Having in mind teachers' busy schedule, we have design two different schedules and added an option to design one just for you. FLLCasts's Mindstorms EV3 Robotics Online Training is the perfect match for any teacher.
After the completion of each task the participant has to upload his solution for verification.
- 136
- 280:11
- 156

How to make the robot move
Нека да разгледаме брика - LEGO Mindstorms EV3 Intelligent Brick. Умната LEGO тухличка.
EV3 брикът е главният компютър на вашия робот. Той има екран, бутони и различни портове.
- 24
- 0
- 11
- 3d_rotation 0

Ниво A - Въведение - Роботика с LEGO
Първото ниво от учебната програма по LEGO роботика за ученици от втори, трети и четвърти клас.
Едно, “пътешествие из космоса”, но с роботи. В нивото се изграждат различни конструкции на роботи. Управляват се моторите така, че роботите да извършват прецизни движения около „земята“, „луната“ и „слънцето”. Преодоляваме различни препятствия след като се блъснем в тях благодарение на сензора за допир. Изграждаме и програмираме роботи, които могат да се сражават и защитават стига това да се наложи.
- 142
- 133:42
- 187

Занятие 2 - Йо-йо
Въведение
Днес ще се научим как да задаваме повече от една команда на робота и ще го накараме да се движи като Йо-Йо. Някой от вас имал ли е Йо-Йо? Как се движи то? Знаехте ли, че преведено от филипински йо-йо означава „да се върне“.

- 18
- 3
- 8
- 3d_rotation 1

Роботика с LEGO - Ниво 1.0 - Приключение в Космоса
Първото ниво от учебната програма по LEGO роботика за ученици от пети до дванадесети клас.
В нивото се изграждат различни конструкции на роботи. Управляват се моторите така, че роботите да извършват прецизни завои около „земята“ и „луната“. Преодоляваме различни препятствия след като се блъснем в тях благодарение на сензора за допир.
С помощта на сензора за разстояние роботът се движи без да се блъска в заобикалящите го препятствия. Достигаме до понятията цикъл, градуси, среден мотор. Накрая роботите могат да изпълняват едновременно две различни неща - докато изпълняват мисии върху специално изградено поле, третият двигател разчиства засечени обекти.
- 126
- 123:52
- 150

Занятие 1 - Движение като Йо-Йо
Въведение
Днес ще се запознаете със съучениците и преподавателя си, ще се научите как протичат занятията ни, ще конструирате първия си робот и ще се научите как да програмирате робот да се движи. Целта на занятието е да накарате робота да се движи като Йо-Йо. Как се движи едно Йо-Йо?

Ако някога сте притежавали Йо-Йо знаете, че то е предназначено да се спуска и изкачва обратно до ръката ви. Но за да се справи успешно, трябва да движим ръката си така, че да му предадем необходимата скорост. В противен случай, той малко по малко намаля разстоянието, което се връща и накрая спира.
Опитайте се да оставите добри впечатления на съучениците си, защото това са хората, с които ще учите до края на курса.
- 19
- 4
- 9
- 3d_rotation 1

Роботика с LEGO SPIKE Prime - Ниво A1
Първото ниво от учебната програма по LEGO роботика за ученици от втори, трети и четвърти клас.
Едно, “пътешествие из космоса”, но с роботи. В нивото се изграждат различни конструкции на роботи. Управляват се моторите така, че роботите да извършват прецизни движения около „земята“, „луната“ и „слънцето”. Преодоляваме различни препятствия след като се блъснем в тях благодарение на сензора за сила. Научаваме любопитни факти за Слънчевата система и за космическите апарати.
- 64
- 30:30
- 76

Занятие 2 - Приливи и отливи
Въведение
Днес ще се запознаем с един интересен ефект предизвикан от Луната: приливните вълни. Може би знаете, че масивните тела имат притегателна сила - гравитация. Гравитацията на луната привлича водата в океаните и затова морското равнище по бреговете на океаните временно се повишава или намалява. Повишеното ниво наричаме прилив, а намаленото - отлив.
Колко мислите, че може да разликата между прилив и отлив в света?

Разстоянието между морското равнище на прилив и отлив може да достигне до 16 метра в залива Фънди в Канада, а най-ниските разлики са в Средиземно, Балтийско и Черно море, където стават само няколко сантиметра. Ние ще използваме 50 см като средна стойност, която да е удобна за задачата.
- 10
- 5
- 12
- 3d_rotation 1