When programming people try to reuse other programmers code. Either because that part of their project is too complicated or time consuming or because there is no need to write code, that it is already written. That allows you to focus on what matters. In our case in order to reuse code from one project into another we need My Blocks. Now we will take a look at how we can import a My Block in our projects.

To access the full video please subscribe to FLLCasts.com
- #768
- 09 Mar 2018
First we open project properties from the tab with wrench on it ![]() in the upper left corner of the program:
in the upper left corner of the program:
Next, we select Import and a new window (file browser) will appear:
We locate the block, that we want to import and we select it. In our case it is called dummy_my_block:
And we have successfuly imported a new block in our project. Now, if we go back to one of the programs in the project, we will be able to find the new My Block under the teal palette (My Blocks). We take it and put it on the canvas and that's it, we are ready!
Finally, let us take a look at the whole process once again:
LEGO Mindstorms EV3 Dummy My Block
This is an example My block used in tutorials to demonstrate the process of creating, importing and editing My blocks.

![]()
Courses and lessons with this Tutorial
This Tutorial is used in the following courses and lessons

Instructors Remote Training
If you are working with students and you want to introduce Robotics to your class or you want to mentor a FLL team, but you are insecure about your technical knowledge in the Robotics field, then this is the right place for you. Having in mind teachers' busy schedule, we have design two different schedules and added an option to design one just for you. FLLCasts's Mindstorms EV3 Robotics Online Training is the perfect match for any teacher.
After the completion of each task the participant has to upload his solution for verification.
- 136
- 280:11
- 156

My Blocks
In this section we will learn how to create, edit, import and use My blocks. First we begin with ilustrating a use of My blocks. There is a whole group of robot constructions called steering robots. Today we will build a steering robot and learn more about the way it is driven through a differential. Then you will have to download a My block that implements the Proportional Line Following algorithm for steering robtos. You need to download, import and modify the block to fit your robot setup. Finally, you will have to create a block of your own and learn how to add parameters.
- 8
- 1
- 10
- 3d_rotation 1
Robotics with LEGO - Level 2.0 - Robots in Factories
The third level of the Robotics with LEGO curriculum for students from fifth to twelfth grades.
Robots in this level use two or three sensors at a time and students create more complex programs for them. The work of the differential and its usage in vehicles with one drive motor is explored. Robots interact with each other and transfer information or material between themselves. Students learn in depth how to create smoother line-following programs. In the end of the workday, robots leave the conveyor belt and relax with a recreational game of volleyball.
- 44
- 15:01
- 129

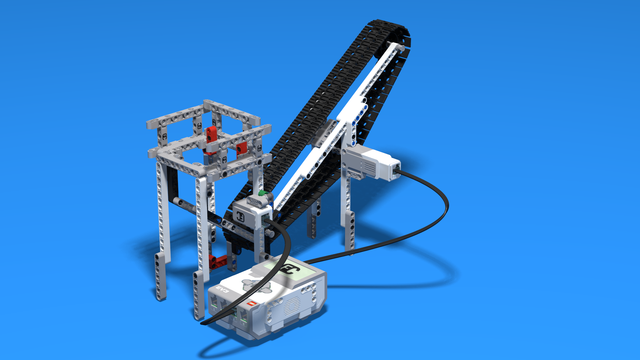
Lesson 3 - Telephone game
In the Telephone is played with 2 or more robots and is extremelly funny. Each robot has a color wheel that can be rotated through the medium motor and a color sensor. The first robot on the left rotates the color wheel to a random color. The second robot must detect the color on the wheel and rotate its color wheel to this color. The third detects the color wheel of the second and so on.
It is described in details in Lesson 4 of Level C2. Cooperation
- 9
- 5
- 21
- 3d_rotation 1
Level B1. "Spy gadgets". Robotics with LEGO
The third level of the Robotics with LEGO curriculum for students in second, third or fourth grades.
In these lessons, we stress on more complex and challenging robots. The concept of Condition is introduced. Students learn about physics concepts of inertia and center of mass. Robots with two sensors are built and students program both of them. Programming becomes more complex as robots now can make complex decisions. "Spy"-robots sneakily follow their targets, trying to be undetected.
- 30
- 7:30
- 108
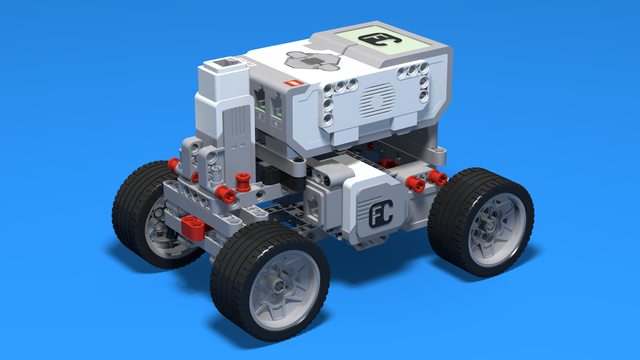
Level C1. "Transportation". Robotics with LEGO
This is the fifth level in the Robotics with LEGO curriculum for students in third or fourth grade.
For the first time robots with steering wheels are built in this level. Those robots use one or two drive motors. The work of the differential and its usage in vehicles is explored. Students learn in-depth the working of the light sensor to create better line-following programs. The first two-wheeled motorcycle-robot is built.
- 33
- 1:03
- 110
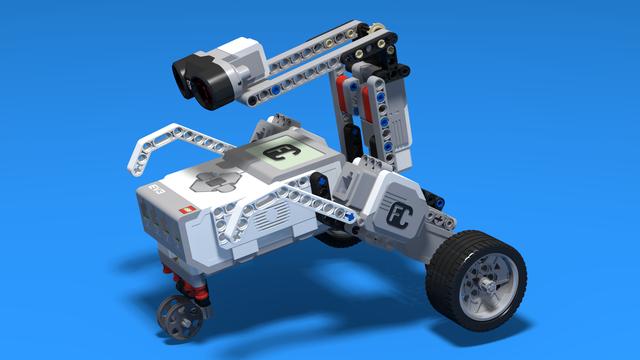
Lesson 6 - Robotics car second version
In the next lesson we usually do a graduation. Write down your impressions about the students and the reasons why they have the grades you gave them.
- 5
- 4
- 11
- 3d_rotation 1