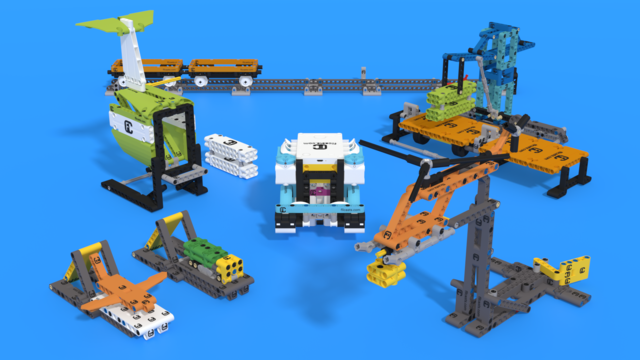
In this video tutorial, we demonstrate an attachment that is activated when we reach the mission model. That means the attachment is not activated by a motor but by the movement of the robot. We accomplish the FIRST LEGO League 2021-2022 Cargo Connect Home Delivery mission model, where we have to move and bring cargo to the mission model and leave the cargo there.
- #2074
- 04 Apr 2023
- 6:56
- LEGO Education SPIKE Prime
- Deliver, Drop, FIRST LEGO League, FIRST LEGO League 2021-2022 Cargo Connect, Attachments, Pinless, Scratch, LEGO Education SPIKE App Word Blocks 2
The principle of the attachment is that it is a lever. We move, and when we push on one side of the lever, we get the lever to activate and leave the cargo on the mission model. The attachment is again pinless, and it can slide into the robot very quickly. This attachment is also configurable, meaning we can configure its position on the robot and practically change it. That allows us to approach the mission in different ways.
English
In this video tutorial we use LEGO Education SPIKE Prime robot with a very interesting attachment and the goal is to bring this yellow box, yellow cargo from the base to this mission model and to place it in this white part. Now, it's important in the mission rules. It said that the cargo should be entirely in the mission model. This is the home delivery mission model. Let's see how we accomplish this mission.
We start, we move and we almost got it. We brought the cargo to the mission model, but the cargo fell outside of the mission model. Let's try again. And our goal here is to demonstrate how this attachment is used and its idea. Second try. It was successful. Let's try one more time.
We move and we leave the cargo on the mission model. We drop it there. Now, for this, we use this very interesting attachment that looks like a lever and we attach it's a pinless attachment. We attach it very easily to the robot and we move and there is a lower part of this lever. So when we place the cargo on the upper side of the lever, it stays there. And now we move. And as we move the lower side, it's very close to the field, very close to the mat, but it is not touching the mat. And as we move, because there is an obstacle in front of us and this obstacle, the mission model, it pushes on the lever and this makes the cargo fall. Let's take a closer look at the attachment. We have the attachment and this is the principle of the attachment. Very simple and very consistent and reliable in its behavior. It's quite easy to implement it and it's quite easy to use it. Let's try again.
Start the program and we drop the cargo.
A few other things about our robot. Now we've reached this place of the field somehow there is a whole course of how do we reach certain specific position on the field, but when we get to here, we can now accomplish the mission. There are a couple of other things that are interesting about this attachment. Like how do we configure this attachment? This attachment, the yellow one, it's configurable we can change the position of this attachment on the robot and it's what we call a configurable construction. Why? Because we might decide to follow the border of the field to reach the mission model and it's good if we are able to change the position on the specific level of the attachment that accomplishes the mission. And this attachment here, it allows us to do this. What we dida also for the video, we added an additional beam to the attachment to make it even more configurable because we might have other attachments that are working on the robot and we might want this attachment to be on the left side. In this way, we configure where do we want the attachment to be. It's a concept that we've used for a lot of years, but we are now starting to explain it. This is something that we call configurable constructions. We move and we see that we can accomplish, even if the attachment is on the left side of the robot. So we can place the attachment everywhere and still accomplish the mission. Let's see the program. Very simple program, but it's a tradition for us, for every tutorial to enter into the program and to describe the program. Now, for this program, we've already reached the mission model. The mission model is right here, it's on the right. And we somehow got to the mission model, we got to the black lines, we've aligned them, we've squared to the border. We are there. How do we get there? There is a specific course for this that's called LEGO Education SPIKE prime programming for competition, where we enter into more details of how exactly do we build a consistent and reliable robot that can reach almost any position on the field, or practically any. And we do this with the use of the motion sensor, the light sensor, a second light sensor, the rotation sensors that are inside of the motors. So get this, and we know how to reach the mission model. But when we are at the mission model or near the mission model, what we must do is the following. We move forward, set movement motors to A and B, set movement acceleration to very slow, set movement speed to 50%. And then we move. We move. We are right here on this block. We move for 20 cm. That's it. We move forward and then we move back. That's it. That's everything that we have to do to accomplish this mission. It's a very simple program for a very simple attachment, but it's a very powerful principle with a lot of configurations for this attachment. We can configure this attachment. And one hope this is a nice, good, creative idea that you can use in your solutions. And I hope I see you in the next tutorial.
Courses and lessons with this Tutorial
This Tutorial is used in the following courses and lessons
FIRST LEGO League 2021-2022 Cargo Connect solutions and review with LEGO Education SPIKE Prime
In this course, we demonstrate and explain example solutions for the FIRST LEGO League 2021-2022 Cargo Connect competition. Just like every year, we share solutions only after the season is over. In this course, you will find examples and principles of building attachments and will learn how to program consistent and reliable robots for each mission. You can follow the course, and as you go through each mission, try to replicate the solutions to understand the programs and explanations. Upon completion of the course, you will have many new ideas about how to approach the missions in every FLL robotics competition and how to help your team score more points.
Before starting this course, we suggest you go through the FIRST LEGO League robot game guide
- 55
- 181:18
- 34

M11. Deliver and drop with a Passive attachment - Home Delivery
In this video tutorial, we demonstrate an attachment that is activated when we reach the mission model. That means the attachment is not activated by a motor but by the movement of the robot. We accomplish the FIRST LEGO League 2021-2022 Cargo Connect Home Delivery mission model, where we have to move and bring cargo to the mission model and leave the cargo there.
- 3
- 1
- 2
- 3d_rotation 4