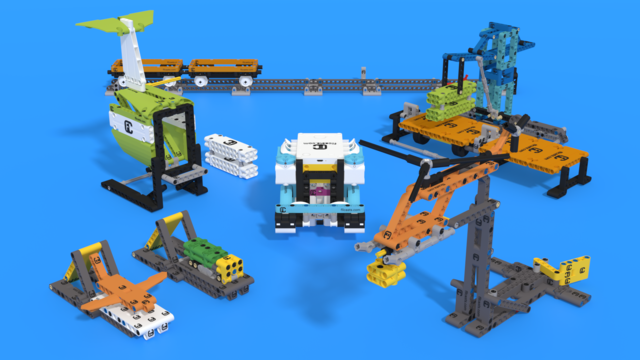
In this video tutorial, we demonstrate a configurable attachment used for accomplishing a FIRST LEGO League 2021-2022 Cargo Connect mission called Sorting Center. The mission model has three cargo objects that are placed randomly. The attachment is configured before the run based on the configuration of the cargo objects. This attachment is also very powerful as it aligns and auto-corrects the errors that the robot is making by squaring the robot.
- #2121
- 28 Feb 2023
- 10:05
- LEGO Education SPIKE Prime
- Lift, Collect, Grab, Align, Move straight, Auto-correct, FIRST LEGO League, FIRST LEGO League 2021-2022 Cargo Connect, Attachments, Pinless, Configurable construction, Scratch, LEGO Education SPIKE App Word Blocks 2, Motion Sensor, Gyro Sensor, Sensors
Configurable construction
With this mission model and attachment, we introduce the concept of 'Configurable construction'. Not that we previously haven't, but now we have a tag for it. Configurable means that we can change the constructions in a few different ways to make it work for the mission model based on how it is set up before the start of the round.
English
In this video we accomplish the sorting center mission from the cargo connect competition. It's a rare kind of mission where before the start we can have these cargoes in different configurations. And we must collect only one, only two of them, the green and the blue one. It's interesting that for this particular mission we've prepared an attachment that could be configured before the start. And it's also an attachment that could self correct and compensate for the errors that the robot makes. Let's see how it works. Here it is. Let's see the attachment. Attachment to action. First we have two axles and before the start of the run we configure the attachment by placing the axles in the correct place. We know this. Before the start of the round we see this. The cargo state could be placed in different ways, but we see them. We reach the mission model from different places. We can align to the black line on the left side or the one on the right side. Doesn't matter. At the end we reach this mission model. We've discussed how we get to mission models in the programming course for LEGO Education SPIKE, prime the mission model. We must accomplish the mission. We move forward and we lift the two cargoes. We collect them. You saw how here it didn't work for the blue one. It happened because I forgot to put the axle to the correctly. That was the problem here. But it generally works really well.
Let's try again.
Same configuration. We must collect the green one and the blue one. Here it is. Successful accomplishment of the mission.
We should take a look at the attachment. The attachment is quite interesting. It's an attachment that could be configured. We transfer power from the motors to the attachment and we use this attachment to lift the cargoes. Here's how it works. Before the start it resets itself, then moves forward and lifts the two cargoes that it must lift. It collects them.
The attachment is pinless except for the two axles that we need to connect the gear wheels to the motor. These are the two axles. It's quite easy to connect it. When we start, we reset the attachment with pushback. This way we know that we can have the attachment start from the same place every time. And now if we change some of the configuration before the start of the run, we change also how the axles are positioned. We must collect the blue and the green one. Let's try.
Here it is. Next we must enter into the program. Before going into the program, I almost forgot. One of the very important things about this attachment is the way that it can compensate for the errors that the robot makes. And this is something that we need to discuss. Need to discuss and to demonstrate. You see how at the front of the attachment we have this two black beams. If the robot is not facing exactly as we need. Let's say that it's slightly to the right. It's a right. You see how it aligns to the mission model because of the two parts at the front. Even if there is a small error, when we get to the mission model, we couldn't get to the mission model perfectly. So there is a small error where slightly to the left. Now you can be 10 left or right. This is too much of an error. But if it is, there is like a centimeter or two of an error the attachment is built in such a way that it auto-corrects and it compensates for the error that the robot makes. It aligns itself. It squares itself with the mission model. Very important principle on all competition. Try to align to the mission model and to compensate for the errors that the robot maker. Now the program. On the left we have the program, on the right, we have the recording. It's a simple program. Because we've already managed to get to the mission model, we are not concerned of how we got there. You can take a look at the FIRST LEG League SPIKE Prime programming course of how we get there. The goal of this tutorial is to discuss the attachment and how we use it. We use the attachment in the following way. We reset the robot. Set your angle to zero, position to B and C and T to zero. We reset the attachment so we bring him back to the robot. So we know that it starts from the same place every time. Set movement motors to A and B and set speed to 30%. That's the initialization part. Here it is. We start the program and it resets. It returns the robot to the initial values. Then we move forward. Now we move forward until the relative position of the motor P is 720 degrees or more. As we discussed many times, we should not use these values. We use them here as demonstration purposes for us to stop them. What we should use is probably detect this black line right here. What we want to demonstrate is that when we move forward, we try to keep a straight line. And this is a slightly different algorithm than previously discussed algorithms. Slightly different. How does it work? We do the following thing the robot is moving with 30% speed. That's true. This is what we are doing. And while moving, if it goes slightly to the right, we will compensate by setting a higher speed on the right. If yaw angle is positive, which means that the road has moved slightly to the right, the yaw angle is positive then we start moving with this zero minus five. And this minus five means move to the left with minus five. This is how to start moving. This here is the block. This is how it works. If we set minus five, it will move to the left. If we set five, it will move to the right. We need the robot to behave in the following way. We need to keep a straight line when moving. If the yaw angle is positive, which means the robot has turned to the right, we need to bring back the robot back to the left. And this way, keep a straight line. For how long? For about 720 degrees. Start. This is it. The other important thing here is you see how the two beams at the front they compensate for the error that the robot makes. When it starts, we go back. And now I'll start it slowly. There is a slight error. The robot is slightly to the left. It's left. When we reach the mission model, it goes slightly to the right and it aligns itself to the mission model. It compensates and auto-correct. When we reach the mission model, it's just move with the motors, collect and move back. That's it. Nothing special here.
Here it is. A simple program with one interesting part, which is how do we keep a straight line when moving forward? Using the motion sensor with a slightly different algorithm than algorithms that we discussed previously. Hope this is helpful and I'll see you in the next tutorial.
Courses and lessons with this Tutorial
This Tutorial is used in the following courses and lessons
FIRST LEGO League 2021-2022 Cargo Connect solutions and review with LEGO Education SPIKE Prime
In this course, we demonstrate and explain example solutions for the FIRST LEGO League 2021-2022 Cargo Connect competition. Just like every year, we share solutions only after the season is over. In this course, you will find examples and principles of building attachments and will learn how to program consistent and reliable robots for each mission. You can follow the course, and as you go through each mission, try to replicate the solutions to understand the programs and explanations. Upon completion of the course, you will have many new ideas about how to approach the missions in every FLL robotics competition and how to help your team score more points.
Before starting this course, we suggest you go through the FIRST LEGO League robot game guide
- 55
- 181:18
- 34

M10. Sorting Center
In this video tutorial, we demonstrate a configurable attachment used for accomplishing a FIRST LEGO League 2021-2022 Cargo Connect mission called Sorting Center. The mission model has three cargo objects that are placed randomly. The attachment is configured before the run based on the configuration of the cargo objects. This attachment is also very powerful as it aligns and auto-corrects the errors that the robot is making by squaring the robot.
- 3
- 1
- 2
- 3d_rotation 3