What is going to happen further along the course and why.

To access the full video please subscribe to FLLCasts.com
- #696
- 09 Apr 2018
TL;DR.
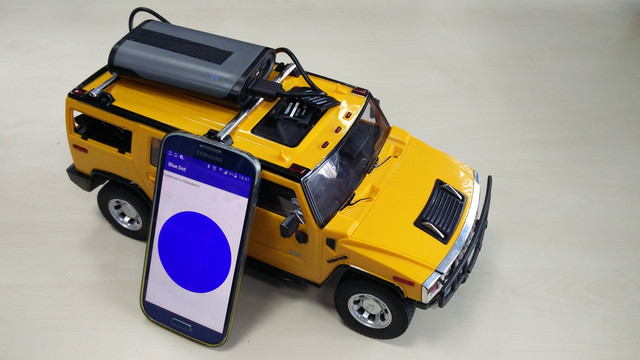
We are going to add three more things to the Raspberry Pi board, so place it to be accessible, or be prepared to open and close your car all the time.
Adding more hardware
We are about to add our first sensor to the car - a simple button. With that button, you can interact with your programs or with your car. You will have to attach to F-F cables to the Rasberry board and that might mean that you will have to open your car again.
Actually, three more times in total, because we are going to add two more sensors after that, so brace yourselves.
Why didn't you say so in the first place
Because our approach is for you to be constantly achieving milestones. That is why when you got the rear motor working, you made tests without the front motor.
Now you had the whole car working and you wrote some python. That is a milestone. Next ones will be using the button and the Ultrasonic sensor.
A word about modularity
There is something important for us to mention. When you are designing things or considering how to close the car, placing the Raspberry and the power bank, you must be always considering future improvements and how to integrate them into your decisions.
So you had a valuable lesson in engineering design here if your car has trouble accessing the Raspberry board.
Courses and lessons with this Tutorial
This Tutorial is used in the following courses and lessons
Perfect STEM course. Module 1 - Smart Car with Raspberry PI
Disassemble a remote control car. Change the brain of the car with a smart computer like Raspberry Pi. Build a smart device with artificial intelligence that you could control from your phone and that could freely navigate itself in the real world and on the Internet. Use your hands. Develop programs for your robot and your phone. Be curious and invent.
The perfect course lives up to its name. You move through the content, we check it and return feedback to you.
In the end, you should be able to better understand how to program and design smart devices that would make the world a better place. For everybody age 12+, 16+, 21+, 35+, etc. The hardware costs about 150$. It changes through the years so it might take some time for you to find it as Raspberry PI, motor drivers, power banks and h-bridges.. they change. Note that the course was designed to be led by a teacher with a decent knowledge in embedded hardware and software. This, on the other hand should not stop you, if you are curious.
- 118
- 42:47
- 136

Execute Python programs about button, from the computer
What is going to happen further along the course and why.
- 3
- 0
- 1
- 3d_rotation 0