With this 10 runs we demonstrate the consistency and reliability that could be achieved with a LEGO Education SPIKE Prime robot and a 2-states simple line following algorithm. It is not bad. Still there are some things you should consider when using this program and one of the things is the use of the timers
- #1934
- 29 Jun 2022
- 4:10
- LEGO Education SPIKE Prime
- Line follow, 10 out of 10, Line following, Scratch, LEGO Education SPIKE App Word Blocks 2, Programming, Light and Color Sensor, Sensors
How to use this tutorial?
Use the program, download and experiment with it. Repeat the program 10 times and see how it works for your robot. Mark the location for each of the runs and take a note of how consistent the robot is. Once you understand the consistency of the robot you will get to build robots and programs that are much more fun and easy to work with.
English
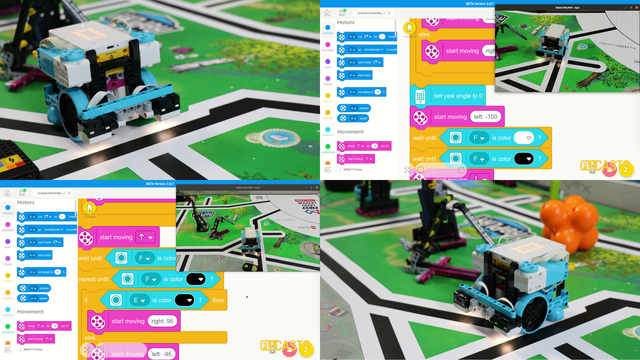
In this video tutorial we do ten runs with a line following and a LEGO Education SPIKE Prime. The goal is to demonstrate how consistent this line following program could be. Let's see.
Let's see how the program works. We start, we'll use the phone to mark the location where the robot arrives. And in this way we can see how consistent it is on the next round. Here it is. First run. This is where the robot is. This is where the robot arrives. Second run. We try to start from the same position. At least the starting location and position should be consistent. We follow the line no problem there.
There is kind of like a 1 CM difference there and it's bugging us. Why is it happening? Why do we follow the line correctly but at the same time we cannot reach the phone consistently and you can see that. So this was consistent with the second one but not with the first one. So first one is different than second and third something is going on here and we should think really hard. Let's check this run and where the robot will arrive.
Almost there. So what we are seeing is that the robot is kind of like consistent. It arrives almost at the same place but not exact. And there is a half an inch or a centimeter difference there. And we're kind of wondering why. The reason why this happens is because of the timer. This program, as we've described in the previous tutorial, we are using the timer and when we are using the timer, we are setting the timer for 10 seconds. Okay, move for 10 seconds and 10 seconds. It's a different timer every time. And I know it sounds bizarre and strange, but what's happening is that the wheels, they slip in different ways. The battery has a different charge. Something on the map could reduce or increase the friction. There are a lot of things that could happen in this small run and even the motors are not perfect and the brick is not perfect. A lot of errors could happen and we say hello for 10 seconds. But these 10 seconds get us to a different place every time. What we should think about, and we are doing it in some of the next tutorials, is not to use a timer but to use a different event that could tell us. So now is the time for you to stop. So timer is a good tool. But timer, it gets you to about half an inch or a centimeter difference every time. And if it is okay for you if the attachment could handle this difference, then please go ahead and use the timer. But if you need a little bit more precise robot then we should think about second events. The robot is reliable. The program is reliable. The algorithm is quite simple. Following the line is quite simple. It's easy to do for both rookie and experienced teams. And the only consideration here is think about timer with the initial position of where do we start? The robot in the base. That's ten runs. See you in the next tutorial.
Courses and lessons with this Tutorial
This Tutorial is used in the following courses and lessons
LEGO Education SPIKE Prime Programming for Competitions with Word Blocks
Two fundamental concepts are essential for robotics competitions: ensuring the robot consistently navigates and positions itself accurately on the field and designing attachments that complete missions once the robot reaches its target. This course focuses on the first aspect - precise navigation and positioning - while the second is covered across the entire FLLCasts platform, starting with the FIRST LEGO League with LEGO Education SPIKE Prime. "Challenge" competition for 9-16 years old
The goal of this course is to help you learn how to program LEGO Education SPIKE Prime robots to operate consistently and reliably in competition settings. We use LEGO Education SPIKE App Word Blocks, a Scratch-based programming language, to teach key techniques applicable to FIRST LEGO League and World Robot Olympiad competitions. Topics covered include different methods for line following, such as fast, slow, smooth, and using multiple states, as well as techniques for line alignment, double alignment, and maintaining a straight path using the motion sensor.
- 40
- 188:21
- 19

Color Sensor - Follow a line with a 2 states algorithm
In this video tutorial we demonstrate the classic algorithm for following a line with robots. It is widely used in FIRST LEGO League competition and could be applied to LEGO Education SPIKE Prime and to other robots also. The algorithm follows a line by moving to the left and to the right and trying to stay at the edge of a black line.
- 2
- 0
- 1
- 3d_rotation 1