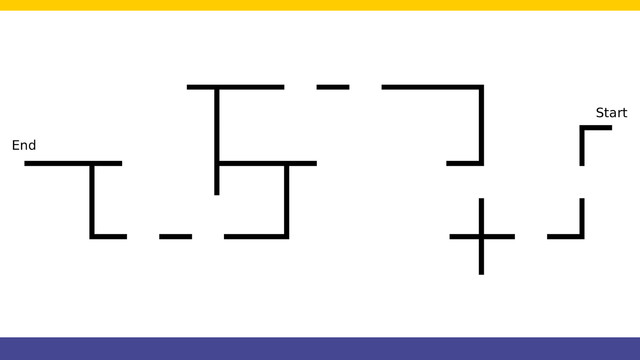
Next state in our state machine programming pattern is the "Turn Left" state and the corresponding behaviour.
- #211
- 02 Mar 2016
- 4:46
- LEGO MINDSTORMS, LEGO MINDSTORMS EV3
- FIRST LEGO League, The Arab championship for robotics - Line Tracking, Line following, EV3-G, EV3, State machine, Light and Color Sensor, FLL, Programming
States
If the line that we are following continues to the left then the robot should also continue to the left. This means a new state and a new behaviour. In this specific line the robot should continue to the left even if there is a line forward.
The left line is detected with the left sensor.
Courses with this episode
The episode is used in the following courses where you can find additional tasks for it to use in class
The power of State Machines. Gapped and Crossed Line Following with LEGO Mindstorms EV3
Use these tasks in you STEM classes:
Tasks description, submission and evaluation are available to subscribed users.
Subscribe now to access the full capacity and get feedback.
English
In this video we continue with the line following program. Turning right, moving through the gap and then, turning left.
For turning left we'll use the left color sensor that is connected on port 3 and the logic for the program will be the following. The robot moves, if it detects something with the left sensor, it turns left. Let's do this in the EV3 software. This here is the program and in this program, first we detect whether we should follow. Then we detect if we are right and now we must detect if we should turn left. For this we'll use the color sensor that on port 3 and for this color sensor we compare the color with black.
So if with the 3rd color sensor we detect a black line, this means that we must enter into a state for turning left.
It's the similar logic as on the right. If this is true, if we are detecting something with the left sensor, then we must enter into a state that's called State 3 and this will be the state for turning left.
It's important to notice that these 2 switches are basically the same, here we are checking for left, here we are checking for right. But it is important to have the right after the left and this will become more clear in a moment. Now we must add one more state to our states and this will be state 3. In this state we must turn left and for turning left we must do it in the same way as we turn right. We have a block for turning right. I'll just take these blocks here and I'll paste them here.
These were the blocks for turning right. And we can use the same blocks for turning left, but we have to reverse the motors. First, we stop, then we move back a little, then we move with motor B forward and then with motor C, we wait to be on a black line. This will be our block for tuning left. We'll give him name, it's called turn left.
And that's the procedure.
The whole program is the following.
We detect whether we should turn left, then we detect whether we should turn right. We set the state and depending on the state we turn left or right.
We can start the program from here.
We could also start the program from here.
Or we can start the same program from here.
We've added a new state and that's the state for turning left. In the next video we'll discuss how do we turn right on a section where we have 2 crossed lines.
Courses and lessons with this Tutorial
This Tutorial is used in the following courses and lessons

The power of State Machines. Gapped and Crossed Line Following with LEGO Mindstorms EV3
There comes a time when you need to program the robot to "follow a line, but if another sensor detects something you would like to stop, do some work, and then continue following the line". This is applicable to competition robots as it is applicable to real-life robots.
There comes the State Machine Pattern. An advanced and very powerful concept that allows you to easily implement complex robot behaviours with a simple, well-organized, extensible, bug-free program where the robot could be in 1,2, 10 or 100 states and you will still be able to manage the complexity of the world around the robot.
- 12
- 92:11
- 0

Turn left state
Next state in our state machine programming pattern is the "Turn Left" state and the corresponding behaviour.
- 1
- 0
- 0
- 3d_rotation 0
