Active vs. Passive Buzzers
At a glance, active and passive buzzers look nearly identical (usually small black plastic cylinders). However, their internal mechanics are completely different:
Active Buzzers: Contain a built-in internal oscillating circuit. As soon as you apply DC voltage, they automatically generate a single, constant beeping or buzzing sound.
Passive Buzzers: Do not have an internal oscillator. They require an external alternating frequency to produce varying musical notes, acting more like a tiny speaker.
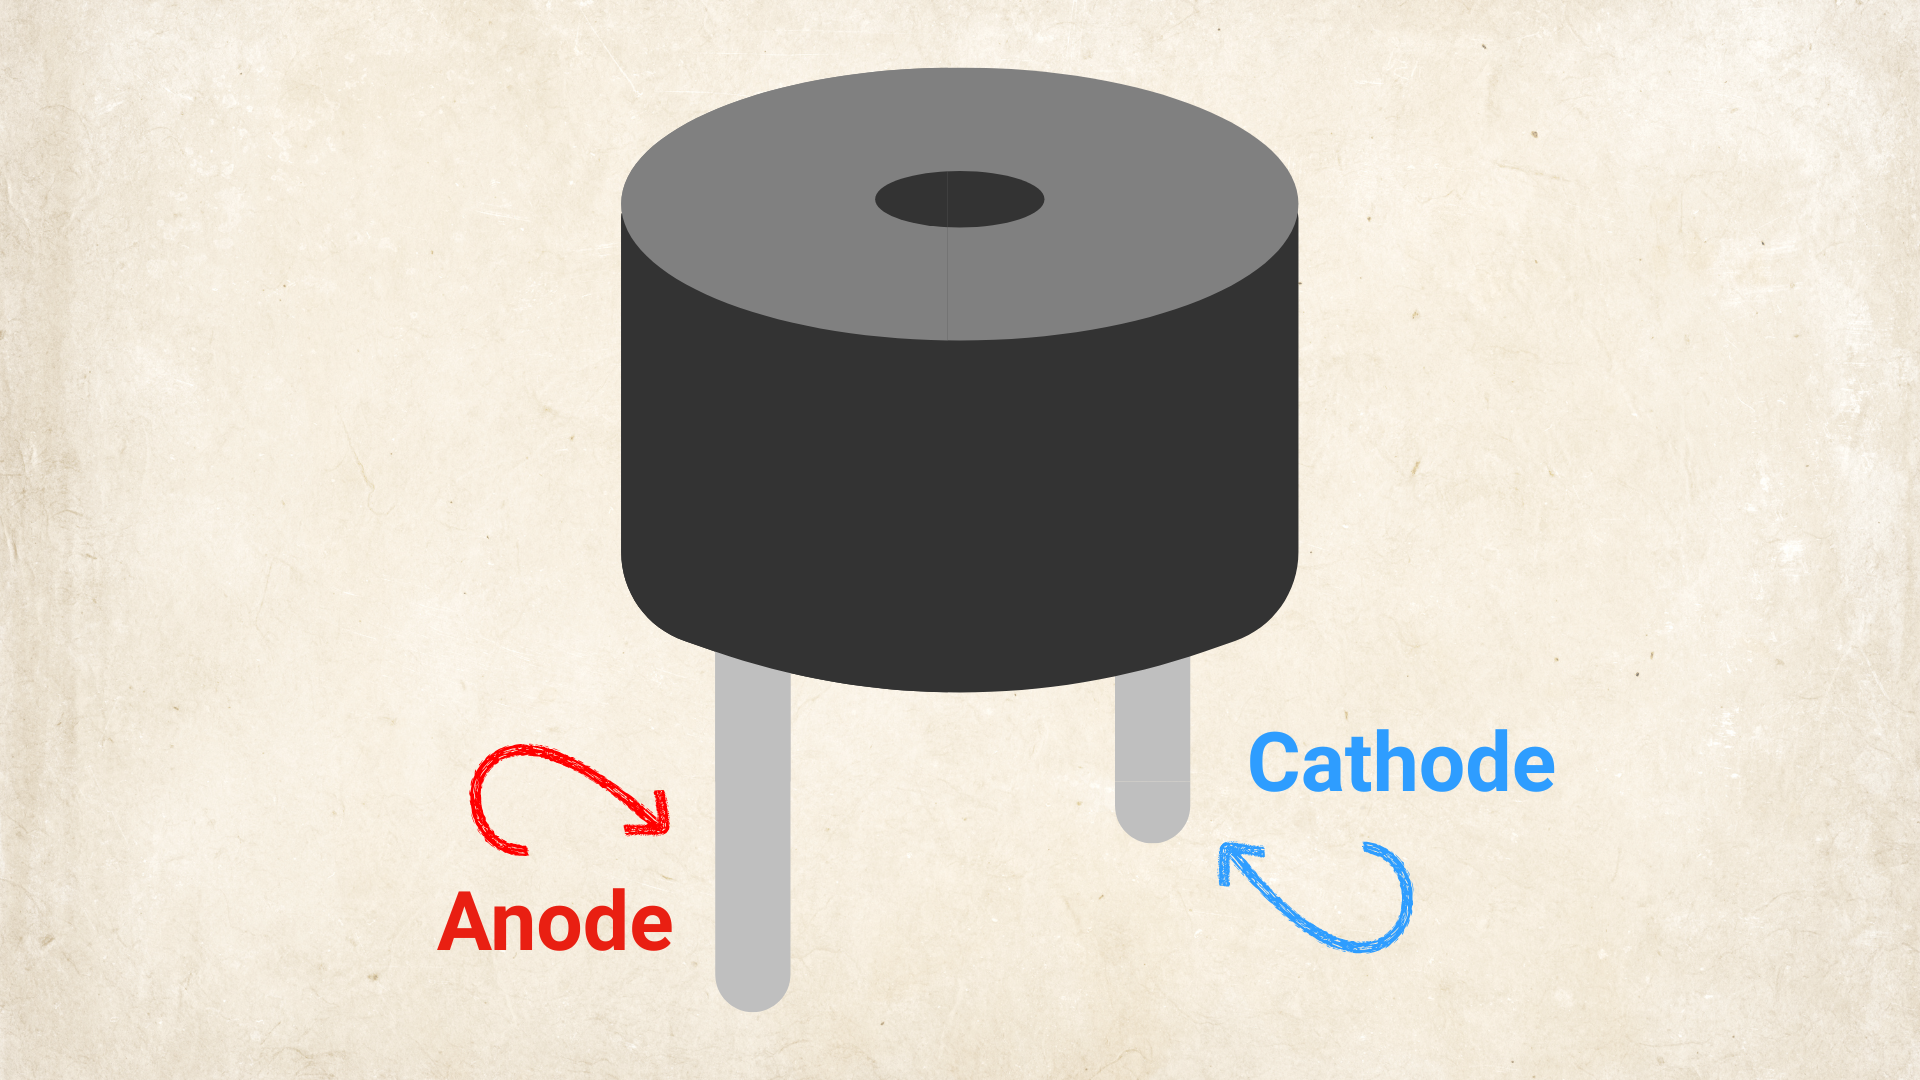
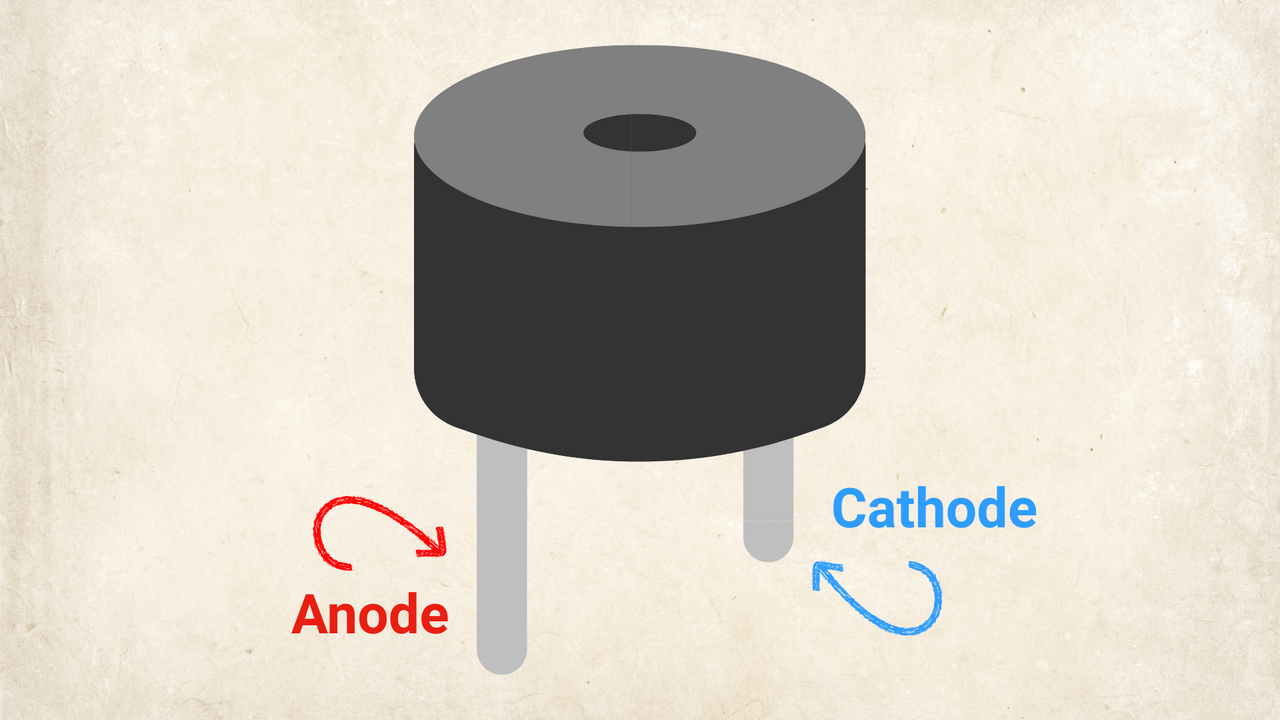
Identifying the Anode (+) and Cathode (-) Legs
Active buzzers are polarized components, meaning current must flow in the correct direction. Reversing the pins can damage the internal circuit or prevent it from working. Check the body and legs of your buzzer:
Look for a tiny "+" printed on the top sticker right next to the longer pin to confirm orientation before wiring.
How to Make Sound
Because active buzzers have built-in oscillators, you don't need complex frequency code to run them. You can control them with a simple switch, battery, or microcontroller pin:
Connect the Cathode (-) to the GND pin of your power source or microcontroller.
Connect the Anode (+) to a digital output pin.
Write code to set the pin HIGH. The buzzer will immediately start sounding. Set it to LOW to turn it off.