In our last episode I showed you how you can convert the direction of the gear from vertical to horizontal. In this episodeI'll try to show you how to achieve the same movement by using an attachment that can move up and down. This is very useful when you have to collect things. For example, this is the chair from the Senior Solutions 2012. And if our motor is placed like this and if we want to collect the chair, we should find a way to move the attachment up and down.
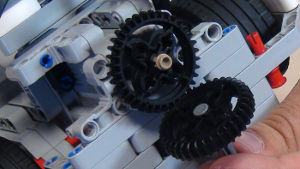
The first thing that you should take into account when you have a gear system is to have a driving wheel, a small one (this is described in some of the previous episodes). So, I'll use this 20-teeth small gear as a driver one and I'll find a way to connect the larger wheel so that the attachment can move up and down. If we find a way to connect the wheel, it will be pretty easy to attach the attachment to the wheel and then to move up and down. A basic idea is to use the holes near the motor. I have prepared two constructions.
One like this and the other one. You can find all the constructions below the video. Now you need an axle. Given that you have an axle, it will be pretty easy to connect the wheel. I'll take the black wheel.
Now we have our gear system almost working.
There are certain problems with this system. The large wheel is moving left and right. So, we could use different parts that would fix the large wheel. For example these.
As you might remember from the previous episode, when you are using the black gears, you would always have half a Lego unit and that's why you should add yellow parts to the axis.
Let's see now.
I'll again need a yellow part.
Now the gears are fixed. You could see that the axle is fixed; it's not moving in any direction. So, it's very stable. And the system is working. Now, let's try to somehow attach this attachment to the axle, so that it can move up and down. I've prepared the following parts.
I'll put one of them on the left
and one of them on the right.
I'll add the attachment to the front.
Now it is already working. It can move up; it can move down. As you can see, there are problems with this attachment. I'll try to move it. The small gear is not very stable. And the whole attachment is not very stable too. You can see that even when the gears are not moving, it is kind of fragile. So, we should find a way to imrpove the stability of this system. A major problem with this construction is that the driver wheel is not very stable. I'll remove the attachment to show you what I mean. We have the axle connected to the motor and now you can see that it's not very stable; it's moving freely. There is a basic principle for solving this. You should always have the axle connected to at least two points. Now it's connected only to the motor and we should find a way to connect it to another point. For example, some beam like this. It will make it much more stable. I've already prepared a construction for this, so we have our attachment. We could add an additional part to this attachment. It's a number of parts. You can see, of course, the whole construction below the video.
Now, when I add these parts and connect them with the axle of the driver wheel,
(it's kind of difficult; ok) the gear wheel becomes much more stable; it is not moving. Then we add the attachment.
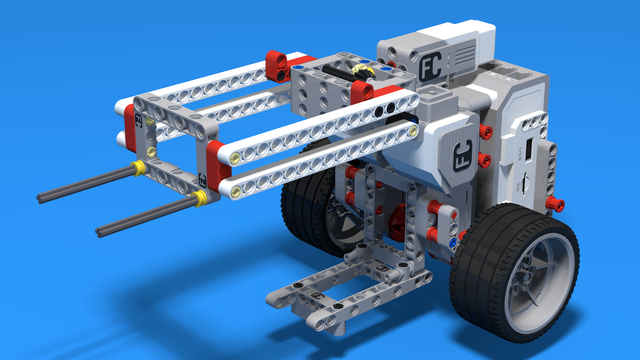
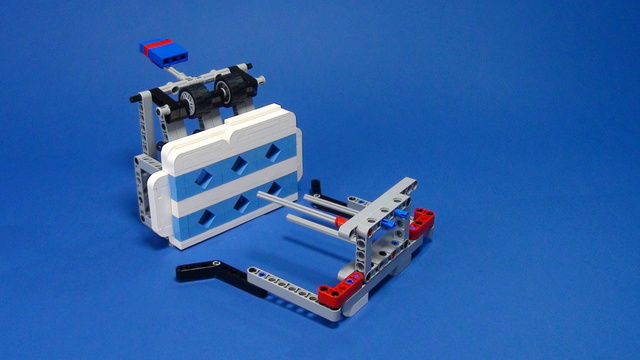
You can see that it's very stable. It's again moving up and down. But it's not that fragile and it looks great. Now, let's see what will happen if we have to attach the attachment to the robot during the competition. Let's disassemble it.
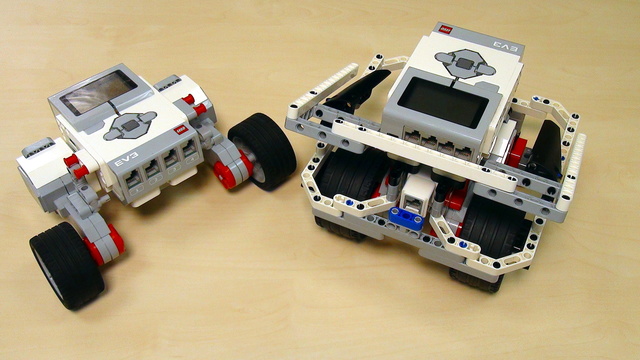
It looks something like this - the robot as a basic construction and the attachment that is ready to be placed on the robot. As you can see, you need at least three hands for this to work.
It is really difficult. If we try to add this attachment to the robot, it will take us something like 1, 2, 3, 4 seconds. OK. So, 4 seconds and we have the attachment. In the next videos we'll improve this construction so that it's much easier to attach. Again, what you could use such an attachment for, is to collect things that are on the field. You could program it and you could then go, move the robot, collect the chair, return, lift the attachment, do something with the chair, place it back, then move again and it's a basic principle for collecting things.