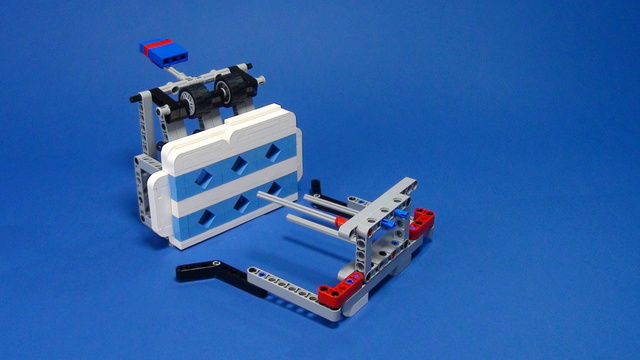
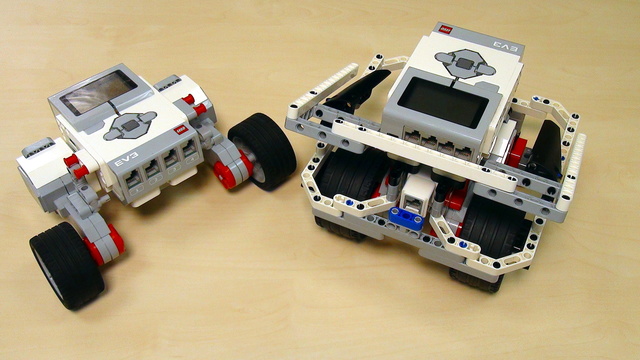
In this episode we build a reusable attachment for a LEGO Mindstorms EV3 robot that changes gears orientation and direction. It is one of the most useful attachments that you could use to move levers up/down and right/left. Adding the attachment on the robot takes 2-3 seconds and shows a very useful general principle of how to build reusable attachments.
- #60
- 16 Nov 2014
- 8:28
Successful teams have the experience, but even more importantly they have attachments build from previous years that could directly be used in next year missions. We have seen teams that just reuse the last year robot and with small modifications and adaptations use it on this year missions.
In this episode we build such an attachment. You could also use it in classrooms to challenge students to improve speed/power, to use different gear wheel, to solve specific challenges.
What I would challenge you to do is to think of a way to build a similar attachment, but without the grey framework used in the video, but stud part or straight beams. Send your solutions to us at team@fllcasts.com or as comments on the page and we could give you feedback on them.
Reusable LEGO Geared Attachment 2
A similar LEGO attachment the previous once, but this one is with a different gear ratio. Again using a frame, two axles and two gears you can change the direction of the motion.
Reusable LEGO Geared Attachment 3
One LEGO gear is powering two LEGO Gears and at the end, from one motor we rotate two axles in opposite directions. Follow the building instructions.
Reusable Geared Attachment 4
Reusable Geared attachment 1
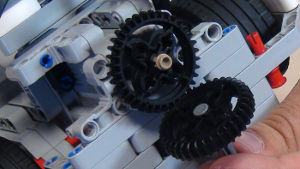
This LEGO Mindstorms Attachment has three gears, one frame and two axles. The goal of the attachment is to use the gears to change the direction in which the motion is transferred.
English
In some of the previous episodes I showed you how you can build active attachments that you can put in front of the robot and attach to the driving motor and you can change the direction of the wheel from vertical to horizontal or you can change it in a way that the attachment moves up and down. In this episode I'd like to try to show you how you can build a general attachment because you can see that the problem is actually the same. Whether we place the gear like this or like this, or like this - it's always the same problem. It will be great if we can build a general attachment using, for example, this part and we can place it like this, like this, like this - depending on the movement that we'd like to achieve.
Let's start from what's given. I've decided to use this part. We can combine different wheels - for example, in the following way.
Now, this will be our driving wheel. We can place it in front of the robot. And we should find a way to position this large 30/60 wheel - somehow that it works with the driving wheel. Again, we'll use a different axle.
This is it. We can attach one of the wheels to the motor and the other wheel will be driven by the first one. As you can see, there is a gap - right here - in the axle. As always, we fix this gap with a small yellow part.
And now we already have this general attachment. Can we place it in front of the robot? Yes.
It's not stable and we'll use these two black parts to attach it to the robot.
And we already have our attachment. We can attach anything to the other side of the axle and we can move up and down with this robot.
Now, let's see how this would work. I'll attach this orange part to the axle and when the motor is turning we can see the gears working and now it's pretty easy to build an attachment that would move up and down. We have this as a general, abstract attachment that we can use in different ways - for example: if we want to have an attachment that moves up and down, we place this construction like this; if we want to have an attachment that moves left or right, we just place it like this. Can we do this? Yes. Now, there are certain modifications to this attachment that might be useful depending on the situation, on the mission that should be accomplished. For example, we can use the same parts on the other side of the attachment.
And we'll get a very interesting result. When the driving wheel is turning in one direction, we have one of the driven wheels turning forward; the other one turning backwards. Let's attach it to the robot.
Of course, this might prove useful in certain situations
and it's kind of interesting. Of course, we can place the attachment horizontally.
One more modification that I'd like to show you for this attachment (you can find the instructions for this attachment below the video) is that when the driving wheel is turning left, one of the wheels is turning forward, the other backwards, we might want both wheels to turn in the same direction. To have them turning in the same direction, we should have them on the same axle. So, I'll just extend this one.
When we have the driving wheel turning left or right, we have the driven wheels turning in the same direction. Either both of them forward or both of them backwards. As a last step, I'd like to clean this attachment a little bit. It's kind of ugly, let's say. For example, we have three different sizes of gear wheels on this attachment. We have a medium one - right here. We have a larger and a small one. It's always a good idea to keep the complexity as little as possible. So, I'll try to replace this medium wheel with a small one. To achieve this, let's disassemble the construction. Take the small wheel;
place it like this. And now you can see that there is a certain gap between the wheels. It's not very stable. We can fix it as we have discussed it in previous episodes - by adding one more yellow part. I'll place it right here.
Then the gear wheel.
OK. We have our attachment fixed. We are using only two wheel sizes - the small ones and the larger ones. We can place this on the robot. Like this. One more thing that we should consider is that there is friction between this part that's holding the whole construction and the wheel. Another good idea is to have some space so that we can reduce the friction. If we place this on the robot,
we can see that it's working much more smoothly and it's cleaner when it comes to the design. I hope that you can find a way to use this attachment in your competition robots or in your classroom robots. You can always place the attachment in different ways - for example up and down. And we'll get the same result.
Courses and lessons with this Tutorial
This Tutorial is used in the following courses and lessons

FIRST LEGO League Competition. Attachments
This course is a collection of materials for many of the attachments that we've built at FLLCasts before introducing courses. The videos were built as separate different attachments for different competitions and with the following course, we try to give it a structure.
- 60
- 347:26
- 0

How to on Attachments with Gears
Gears could be a powerful tool for those who know how to use them appropriately. In this episode we introduce some of the basic terms and concepts behind using gears in your construction.
- 6
- 0
- 0
- 3d_rotation 8

A Robot A Day Keeps The Questions Awake
"How to use the LEGO robots to facilitate the learning of robotics by my student at home" or simply put - "what to build now?"
After enrolling in this course we will send you a few (1-2-3) emails each month with a title "A robot a 'day'". Each email contains a robot building instructions and/or video tutorials and/or tasks that should be accomplished. After a task is accomplished we might sometimes ask for a video or picture.
This process gives a structure of the learning process where you can learn from the content. The student participates in a course, but from home and on the schedule that you decide.
- 26
- 98:39
- 47

MotoCar Bot. Work with gears and levers. Two magic tricks at once. Robot 5
"How do you build a forklift using only gear wheels and levers without a rake"... Ok, we would admit that is a difficult question. It even sounds difficult. So let's start with something easy. A LEGO Mindstorms EV3 robot. It lifts objects in the air. It uses two gear wheels that work together and then move in different directions and are placed perpendicular to each other... This sentence kind of got difficult again... Let me try again.
Follow the building instructions with these 70+ steps and you will have a very nice robot and you will learn a simple trick of how to use gears and change the directions in which they rotate.
- 8
- 0
- 3
- 3d_rotation 1

EV3 Basic Course. Introduction to robot programming, construction and sensor use
This course is designed for students, mentors and teachers that are completely new to LEGO Mindstorms EV3 robots and would like to start using them to learn, in classes or at competitions. It is quite different from previously built resources at FLLCasts because it makes no assumption on any previous knowledge and tries to introduce everything step-by-step.
- 38
- 193:26
- 30

LEGO Gears. Changing Orientation
Based on feedback from many of you in this episode I would like to show you how to build an active attachment that changes the orientation of a gear wheel placed vertically to a gear wheel placed horizontally. This attachment could be used in competitions and shows a basic principle of changing the orientation. All attachments could follow the same principle.
- 4
- 0
- 0
- 3d_rotation 12

FIRST LEGO League with LEGO Education SPIKE Prime. "Challenge" competition for 9-16 years old
This is the most detailed course we've ever created on preparing for a FIRST LEGO League robotics competition. It focuses on using LEGO Education SPIKE Prime to build a simple Box Robot. The course includes 25 lessons, making it suitable for both beginners and advanced students. It builds on over 10 years of experience providing example solutions and explanations for FIRST LEGO League robotics competitions.
This course is one of the popular courses in the FIRST LEGO League Robot Game. The Complete Guide. We highly recommend checking out the full guide!
- 40
- 127:22
- 24

Reusable Attachments for changing gears orientation
Reusable attachments are our favorite. They could be used in a number of different scenarios especially on robotics competitions like FIRST LEGO League/World Robotics Olympiad. This tutorial shows how this reusable attachment could accomplish a mission for lifting a lever. It uses Luly, a small LEGO Education SPIKE Prime competition robot with 3D building instructions as a robot base.
- 2
- 0
- 1
- 3d_rotation 10


