

Improving FLL Robot Game. Using a rack for Lifting.
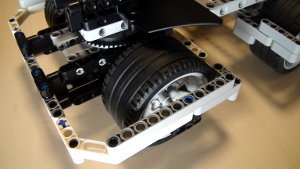
The next step of lifting a robot to a mission model is to try to use a rack.
- #448
- 05 May 2017
The next step of lifting a robot to a mission model is to try to use a rack.

Next important state is Turn Right with our robot. This happens when we detect a line on the right.

This second part continues with importing two previously developed in Episode 53 blocks into our program. With them we can for align to lines. We program the robot to align to the cross line and start following it.

Many teams have followed the same idea as the ELM team. To build a LEGO Mindstorms attachment for the robot and to lift the truck very lightly. In this way they could more the truck and place it in the special region. See what the ELM idea was.

We've already build a number of resources for lifting at FLLCasts.com. But at the end of this course we would have a robot that lifts itself and hangs on the mission model.

Go to the missions model. Do the missions. You can then continue to the next mission or wait a few seconds at this FIRST LEGO League 2015 Trash Trek mission model and receive a few more points. Isn't it interesting. The ELM team has build a LEGO Mindstorms attachment for this robot. Let's see how it works.

We show the principle of solving the next FIRST LEGO League (FLL) Nature's Fury 2013 competition missions. Again, without any programs, but just the principles of using one attachment for most of the missions.

This video tutorial contains a detailed explanation on how we accomplish the FIRST LEGO League 2018-2019 Into Orbit mission called M09. STRENGTH EXERCISE. I could think for a couple of missions in previous years that require lifting a heavy object. Let's see how this mission could be accomplished.

Next state in our state machine programming pattern is the "Turn Left" state and the corresponding behaviour.

Let's record the values of the Gyro Sensor while the robot is moving and is trying to keep its orientation straight. This is an interesting experiment and we will have to use file access to write the values to a file.

We can Turn Right. We can Turn Left. How do we decide which way to go if there are lines both to the left and to the right. Check out the video.

The third part of the series the goal is to extend the robot attachment so that we could solve the second part of the FIRST LEGO League World Class mission challenge - to take the loop.

In this video tutorial we would look at the mission run for M09. STRENGTH EXERCISE. The mission is to lift a heavy object in the air. And that could a complex mission. It requires to use gear wheel and the attachment should be quite strong. The tutorial contains only the mission run on the field. We accomplish a single mission.

The attachment is now so advanced that we can do two tasks at once with it in order to solve the FIRST LEGO League 2014 World Class Search Engine Mission.

Third, and last video of this series on how to use ONE attachment to solve the FLL 2014 World Class missions.

This video tutorial is about understanding the "magic". In this video tutorial, we would conduct an experiment and will look at how exactly does the integral part of the PID algorithm compensate for the error that the LEGO Mindstorms EV3 robot makes.

This video tutorial is part of the series on how to make your robot 100% precise and accurate. We accomplish the M06. SPACE STATION MODULES mission 9 out of 10 times. The attachment works. Every time the attachment is started in successfully accomplishes the mission. It moves forward and attaches the space station module with the space station.

Based on your feedback we have decided to show you the live process of building a complex LEGO Mindstorms Competition robot without having the whole robot ready yet. We are continuing from part 1 where we finished part of the 'front' of the robot and we arrived at a construction that we didn`t like and would fix in this video lesson.

The final way for lifting our box robot is by using a scissors mechanism. In this Episode, we would discuss the benefits and advantages of this mechanism.

In this tutorial, we would drive the scissors mechanism and there are a number of rules that we must follow

All worked as expected, up until know because the robot got lost. This happens when we turn right and the line does not continue to the right. Now the robot must somehow understand that it is "lost" and escape.
We continue from part 4 where we made a controlled experiment to transfer power from a Mindstorms motor to the rear wheels. The construction was too complex and inefficient and in this video lesson we are improving it by lowering the differential and removing all gear wheels from this LEGO Mindstorms EV3 Competition robot.

Extend the previously build attachment for the FIRST LEGO League (FLL) Nature's Fury competition so that we can move the Truck and Ambulance up and down.

We continue from part 3 where we finished part of the 'rear'. Power is transfered from a motor to the wheels but having about 16 gear wheels makes it more than complex for this LEGO Mindstorms EV3 Competition robot.

It has been a long road with the last 8 BigDaddy competition robots video tutorials, but we finally arrived at the Differential Lock.

In the final video we explore how to trigger the release of the attachment with just a rubber band. The release is triggered with a gear wheel that rotates in a specific way. This saves speed, does not require additional LEGO Mindstorms motor and is precise enough for a competition.

We discuss the state of "Lost" and the different ways we could escape this state. We also build the next step of our State machine programming pattern where the next state is determined by the previous state.