Има няколко неща, за които да внимавате, когато учениците работят с брика.
- #351
- 24 Jan 2017
- 4:45
Брикът не се включва
Ако брикът не се включва, проверете пружините на батерията.
Учениците може тайно да си поиграят с батерията и да я затворят по неточен начин. Ако сложите пълна батерия и брикът не се включва, вероятно пружините не правят контракт.
Изобщо недейте да споменавате батерията
Преподавателят може да забрани пипането на батерията. Всичко забранено обаче е още по-интересно за учениците и те тайничко ще експериментират.
Преподавателят може да покаже как се отваря и затваря батерията. Това е вид разрешение,че и учениците може да правят така и съответно да се опитат да отворят батерията.
Преподавателят може и да не спомене батерията изобщо. Тогава тя няма да съществува в представата на учениците и най-вероятно изобщо няма да я пипнат. С изключението на най-любопитните от тях. Едва в този случай ще се наложи да им покажете как се борави с батерията.
Подберете си подход по въпроса с батерията в групата си. Ако имате много групи, опитайте и трите подхода и проследете резултатите. Споделете ни в коментар под тези бележки, ако резултатът се различава от нашите описани очаквания.
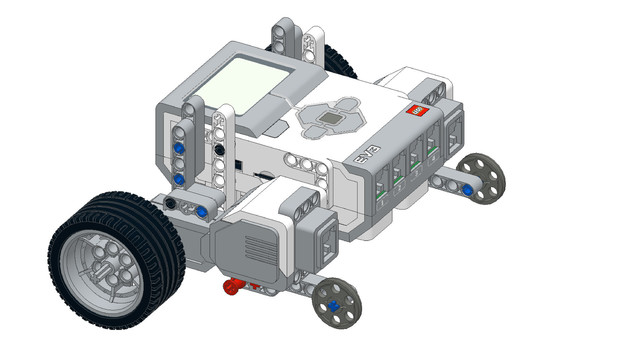
Използване на USB порт за връзка с компютъра
USB портовете се чупят след около година-две интензивна работа и е по-добре да използвате Bluetooth връзка, когато е възможно.
Верижен режим
USB портът отляво на брика се използва за верижен режим, така че да се осъществи връзка между няколко брика.
English
A teacher note for the brick. When using the brick with a group of students there are some important things that you should be aware of and you should be careful. So, let's stop at some of them.
The first thing is the battery. And we have the battery. This battery comes from Lego and you can remove this battery, you can place it into another brick if you need to. You can charge this battery, you can see the input for the charger right here. And when you're in a group of students, probably some of the students will be curious enough to open the battery and then they'll try to close it. Now, what's important is that when students are closing, sometimes, not very often, but we've seen this, they could bend the springs. And if they bend the springs, probably you won't have good contact between the battery and the brick. And from there the brick won't work. So, it's important to be careful in the group. Now, there are different strategies. First, you can just tell all the students. You know your students. Because these videos are watched from people from all over the world. And there are different approaches to the students. You know your students. So, you can just tell them 'Okay, this here is the battery and please don't open the battery because it might brake because there's a spring inside that could bend'. That's one approach. Another approach,of course, probably we prefer the second approach more is to just don't mention the battery at this stage of the course, don't tell them that you can open it and then you can close it because then they'll start experimenting. And this form of describing is some kind form of allowance and they'll start experimenting and first you lose a few minutes in the class and then you risk some of the springs to bend. And, again, it's your approach but I'd recommend the second one. For this stage of the course don't mention the battery. But just be careful if some of the students open the battery and try to be with them and to help them close the battery. Second note is about the port for connecting the brick to the PC. Now, you take the USB cable, you connect one end of the USB cable to the brick and the other end to the computer. Then the students write the program and download it. Then they remove the cable, place the robot on the floor and start the program. Then they return back to the computer, connect again, then disconnect, then connect again, then disconnect. And it's common to do these things like 100 times in a class. And because these are students they might not be careful a few times and they could break the port. And we have about 5-10% of our bricks that already have this port broken because of this constant connecting and disconnecting of the USB cable. If you're in a group of students always try to use the wireless connection, the Bluetooth connection between the brick and the computer. And in some of the next videos we'll stop at exactly how do you configure this wireless connection and how to use it. And there are some very nice tricks you can do there to make it easier to work with Bluetooth connection in a group. You can also see that the intelligent brick from Lego Mindstorms has another USB port on the left side of the brick. This is your left side of the brick. And you can use this port to connect two bricks together and the term is 'daisy chain'. So, you add one end of the USB to one of the bricks and the another end to another brick and then both bricks can communicate with this. And again we'll stop in some of the next modules of how exactly do you use this functionality.
Курсове и занятия включващи този Урок
Този Урок е използван в следните курсове и занятия.
EV3 Phi. Introduction to robotics with LEGO Mindstorms
The things that you will be able to do with your EV3 robot by the end of this course are:
Freely move your robot towards desired target;
Avoid obstacles on the path of your robot using sensors;
Follow lines of any shape;
Detecting and picking up objects of any kind;
- 92
- 220:20
- 36

Parts, components and notes about LEGO robot constructions
Overview of what is going to happen in module 3
- 7
- 0
- 1
- 3d_rotation 0

Ниво A - Въведение - Роботика с LEGO
Първото ниво от учебната програма по LEGO роботика за ученици от втори, трети и четвърти клас.
Едно, “пътешествие из космоса”, но с роботи. В нивото се изграждат различни конструкции на роботи. Управляват се моторите така, че роботите да извършват прецизни движения около „земята“, „луната“ и „слънцето”. Преодоляваме различни препятствия след като се блъснем в тях благодарение на сензора за допир. Изграждаме и програмираме роботи, които могат да се сражават и защитават стига това да се наложи.
- 142
- 133:42
- 187
Коригиране и довършване на конструкцията
Ще ви покажем какви са типичните проблеми, които правят учениците, когато строят робот.
- 7
- 0
- 6
- 3d_rotation 0

Роботика с LEGO - Ниво 1.0 - Приключение в Космоса
Първото ниво от учебната програма по LEGO роботика за ученици от пети до дванадесети клас.
В нивото се изграждат различни конструкции на роботи. Управляват се моторите така, че роботите да извършват прецизни завои около „земята“ и „луната“. Преодоляваме различни препятствия след като се блъснем в тях благодарение на сензора за допир.
С помощта на сензора за разстояние роботът се движи без да се блъска в заобикалящите го препятствия. Достигаме до понятията цикъл, градуси, среден мотор. Накрая роботите могат да изпълняват едновременно две различни неща - докато изпълняват мисии върху специално изградено поле, третият двигател разчиства засечени обекти.
- 126
- 123:52
- 150
Коригиране и довършване на конструкцията
Ще ви покажем какви са типичните проблеми, които правят учениците, когато строят робот.
- 7
- 0
- 6
- 3d_rotation 0
Забавното ниво - въведение в LEGO роботиката чрез игри
Това ниво цели да въведе учениците ни в света на LEGO роботиката, използвайки игри. В занятията използваме предизвикателства и мисии с цел учениците да искат да ги преминат. Така те усвояват знанията, защото са им нужни за да съживят роботите си.
Част от игрите включени в курса са футбол, боулинг и изстрелване на хартиен самолет. Нивото работи с ученици от 8 до 12 години и дори по-големи, които също ще се забавляват с игрите с роботи.
- 38
- 42:14
- 40

Занятие 1 - Въведение
Въведение
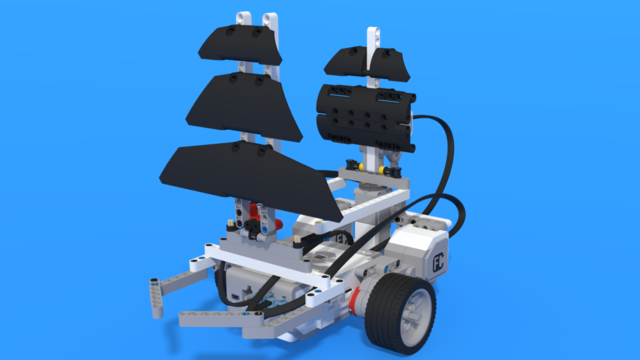
Днес роботът ни ще бъде космически кораб като предният. Целта ни днес, обаче, е конкретна: Да достигнем до далечната страна на Луната!
Къде се намира далечната страна на Луната? Защо е толкова трудна цел?
- 23
- 3
- 15
- 3d_rotation 1