
Python program to turn until reaching an angle with LEGO MINDSTORMS Robot Inventor Gyro Sensor
Python program to turn until reaching an angle with LEGO MINDSTORMS Robot Inventor Gyro Sensor.
- #acvosd
- 23 Mar 2022

Python program to turn until reaching an angle with LEGO MINDSTORMS Robot Inventor Gyro Sensor.


In this video tutorial we demonstrate the behavior of a LEGO Mindstorms Robot Inventor robot when we use the Motion sensor. The Motion sensor was also referred to as Gyro sensor in previous versions of the LEGO Mindstorms Robot. We do not enter into the details of the programming and you can download the programs from the course lesson, but we make a demonstration of how the robot turns to about 95 degrees when we try to turn it to 90 degrees, we explain why and we suggest a way to improve the behavior of the robot.

This program makes the robot move in a straight line with the user of the EGO MINDSTORMS Robot Inventor Motion sensor. It's developed with Robot Inventor - LEGO MINDSTORMS App Python and uses a very simple algorithm for moving straight. When the robot moves slightly to the left or right align it face forward. Try to push the robot slightly. See what happens.

Scratch program to turn until reaching an angle with LEGO MINDSTORMS Robot Inventor Gyro Sensor.

This program makes the robot move in a straight line with the use of the LEGO MINDSTORMS Robot Inventor Motion sensor. It's developed with LEGO Education SPIKE App Word Blocks and uses a very simple algorithm for moving straight. When the robot moves slightly to the left or right align it face forward. Try to push the robot slightly. See what happens.


In this video tutorial we try to move forward with a LEGO Mindstorms Robot Inventor robot and we try to keep a straight line using the Motion Sensor. Without entering into the details of the programming we demonstrate what is the behavior of the robot when trying to keep a straight line with the Motion Sensor while we are participating in a FIRST LEGO League competition.
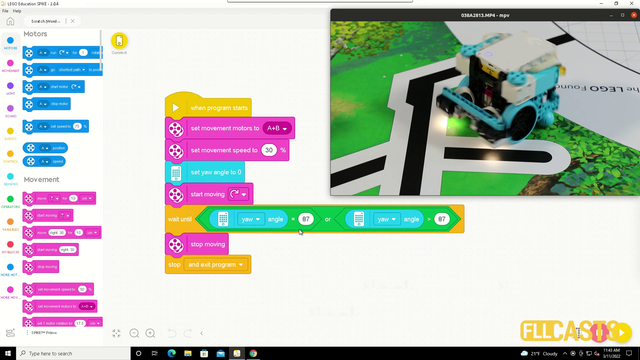

In this video tutorial we demonstrate the use of the motion sensor and how it could be use to turn precisely to 90 degrees. We demonstrate some of the caveats of the sensor and how sometimes it does not work as expected. Like you set the robot to turn until the sensors detects 90 degrees and at the end the robot is not at exactly 90 degrees.


Is it better to do fast turns or slow turns? Should you save some time by turning fast or should you be more precise by turning slow. Where is the balance? This video tutorial demonstrates exactly this for LEGO Education SPIKE Prime robot, their motion sensor and an ever occurring question on FIRST LEGO League competition which is how to find the balance and where is the balance.
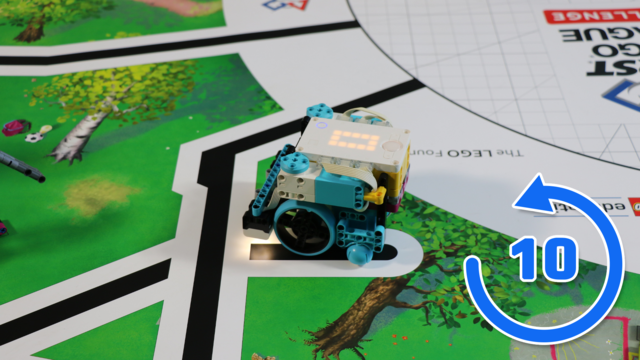

This LEGO Education SPIKE Prime video tutorial demonstrates the difference in turning slow and turning fast and using the Motion sensor to understand the orientation of the robot. We do 10 consecutive runs. The goal is to understand what can you expect from the robot behavior in terms of consistency.


In this video tutorial we explore acceleration and deceleration and how to make the robot turn precisely by using acceleration and deceleration. The goal is for us to demonstrate a program that turns the robot to 90 degree. In the first 45 the robot is accelerating and in the second 45 it is decelerating.


In this video tutorial we take a look at the consistency of a robot that uses acceleration and deceleration to turn precisely. We use the motion sensor. In 10 consecutive runs we demonstrate what could you expect from the robot when it comes to consistency.
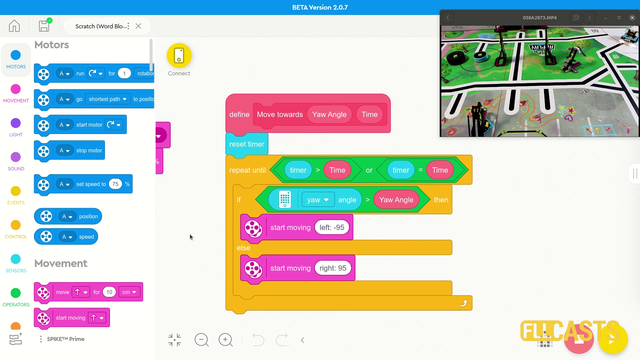

In this video tutorial we use the LEGO Education SPIKE Prime Motion Sensor to reach a mission model on the field. It's a basic use of the motion sensor that we will extend in the next few tutorials and in the same time we take the opportunity to demonstrate what a MyBlock is and how to develop one. As a result of this video you will learn how to make the program easier to read and maintain by organizing the blocks in the program in special MyBlocks that couple them all together.


We use a sensor so the robot must be reliable and accurate right? Wrong. The robot is not reliable and accurate only because we use sensors and that's really important during FIRST LEGO League competition. There is a reason for this and in this tutorial we demonstrate and explain how the robot behaves with a basic use of the Motion Sensor to move straight. As a result you will learn why is it important not to stop at this stage and to go to the next level with more advance use of sensors.


This is the first video tutorial from the LEGO Education SPIKE Prime programming course in which we use a sensor, and we've selected to use the motion sensor. The Motion sensor allows us to detect how the robot turns in a 3-dimensional space-time continuum, or, to put it simply, we use it to move straight with the robot. That's it. We want to move straight - we use a sensor, and the Motion Sensor is a good choice.


This is one of the last tutorials in the LEGO Education SPIKE Prime programming for Competitions course and it demonstrates what we've all been waiting for - how to reach a mission model from base in a reliable and consistent way when the mission model is on the other end of the field. Naturally what we use are all the different concepts that we've learned in the course and the tutorial is more advanced than the other so if anything is not clear take a look also at the different tutorials an concepts in the course.

Using everything that we've learned about LEGO Education SPIKE Prime competition programming we arrive at the final boss mission - how do we consistently reach a mission model at the other end of the field. Consistently. Every time. We use line following, motion sensor, counting of lines and border alignment. All the different concepts that we've looked at separately are now implemented together.
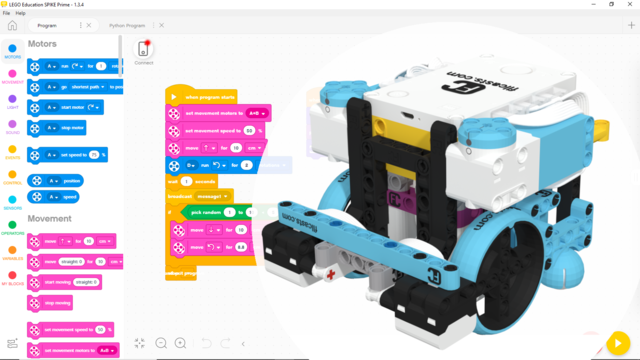
In this program, we present an "MY BLOCK" that follows a line presented as a yaw angle from the robot's starting position. If the program acts differently when tested again, then the most likely problem is the direction the robot is facing, when starting the program. Make sure to place the robot at the correct starting position with the correct facing direction, before every test.
This program was intended for and tested on the Gazon robot
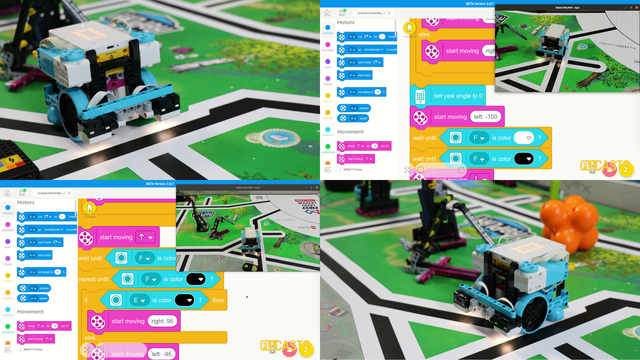
Two fundamental concepts are essential for robotics competitions: ensuring the robot consistently navigates and positions itself accurately on the field and designing attachments that complete missions once the robot reaches its target. This course focuses on the first aspect - precise navigation and positioning - while the second is covered across the entire FLLCasts platform, starting with the FIRST LEGO League with LEGO Education SPIKE Prime. "Challenge" competition for 9-16 years old
The goal of this course is to help you learn how to program LEGO Education SPIKE Prime robots to operate consistently and reliably in competition settings. We use LEGO Education SPIKE App Word Blocks, a Scratch-based programming language, to teach key techniques applicable to FIRST LEGO League and World Robot Olympiad competitions. Topics covered include different methods for line following, such as fast, slow, smooth, and using multiple states, as well as techniques for line alignment, double alignment, and maintaining a straight path using the motion sensor.
We have updated the programs from LEGO Education SPIKE App 2 to LEGO Education SPIKE App 3.5.1, so you might see inconsistencies between the tutorials and the programs. They are mostly visual, and the programs function as intended.


This tutorial explains the use of motion and light/color sensors to accomplish a complex mission split into three parts. It gets into detail about how we keep a straight line with the motion sensor, follow a line with the color sensors, and transition between different parts of the program by aligning and detecting lines with the sensor. The goal is to get to a reliable and consistent behavior of the robot. On top of that, it is configurable, as we've left a few parameters that could be set to configure the behavior for a specific robot, venue, lighting, battery level, and wheels friction.